As you can see Vanagon.com is relaunching in the Word Press format for 2017! This is great because it makes it very easy for me to add information and articles to the site. When I was moving information from the old site onto this new one, the problem I am running into is that the information on the old site is very dated. For example, they listed many different brands of tire working with the Vanagon, and that was true back around the year 2000. However in 2017 I could only find 3 that were properly rated and currently being sold. I need your help writing up to date articles for this site. I want vanagon.com to be the repository for Vanagon knowledge in the universe. The first place a new Vanagon owner or potential Vanagon owner can come and find out about their van from the experts. If you can write an article, please send me a message through the site. I will review it, edit it if necessary and post it with your name on the article. You will become immortalized in the annals of Vanagon history, and also reap the rewards of the love of all Vanagon owners everywhere. We will benefit from your wisdom and experience. It is a win-win. Please think about how you can help and then let me know. Sincerely, Your gracious Admin.
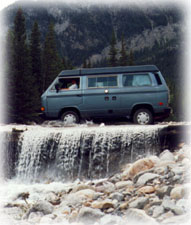
Vanagon Tires 101
Vanagon tires
The Syncro Westy of 1987 called for minimum load index (L.I.) of 97. Later models have been reported to me to call for 99 minimum on 14×5.5″ rims and 107 for 14×6″ rims.
Here is a chart of load index (L.I.) ratings:
L.I.
—–
97 730kg 1609-1652 pounds
99 775kg 1709-1763 pounds
107 975kg 2149-2200 pounds
Reinforced sidewalls
Tony Peet writes:
Reinforced sidewalls are extremely important for Vanagons because their high center of gravity and narrow track puts excessive forces on the sidewalls! (Stand up and lean to one side and then imagine what would happen if your bones/ligaments etc were “mushy”!)
Some list members reported ‘cracks in the sidewalls’ — that is why it happens. The folks at Michelin have had more than a few of the wrong tires on Vanagons returned to them with cracked sidewalls, which can (and I don’t want to be alarmist here, but just inform) lead to what they call something like ‘bead failure’ (the inability of the bead to keep the tire on the rim I think) and resulting ‘catastrophic blowout.’ Not a pretty picture, not likely to happen, but a possibility in cases of extreme wear and something the list needs to be more aware of in my opinion.
This is why Michelin corporate was so adamant about the Agilis on the phone with me. One tech guy was not quite, but nearly, hysterical.
I hope this helps, and please, let’s be more conscientious about informing people – especially new list members/owners — about the sidewall considerations in tire shopping/purchasing — irrespective of what brand they chose.
Tire Recommendations
Tire recommendations
These tires have been recommended by members of the vanagon mailing list.
I have updated the list to reflect tires that are currently available in 2017
Yokohama Y356 from Tirerack.com
Vredestine Comtracs on Tiresbyweb.com
Hankook RA18 Tires from Busdepot.com
If you know of any more brands that are available in the two sizes recommended for the Vanagon 14″ Rim please let me know and I will add them. However please include a link to a site where they are currently available to purchase. Also I am only interested in load range C or D tires that have the correct load rating for the Vanagon.
Vanagon FAQ
Purchasing
I want a van! Where can I get one?
Well, if you live in the San Francisco Bay Area, Seattle, Denver, or New Mexico, you’re in luck, because Vanagons are plentiful in your area. If you live in New England, the South, or Midwest, they’re a little less common, and you may need to travel to find your dream van.
Places to search online include:
The Samba
Your Local Craigslist
Ebay
Pop Top Heaven
Westfalias for Sale .com
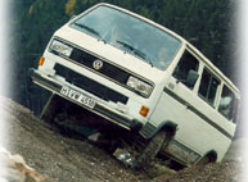
What should I look for when purchasing a van?
The first thing to check when buying a Vanagon is the head gaskets. (This isn’t a known problem with EuroVans.) You should be familiar with the head gasket problem, as described in the document ‘Vanagon head gasket leaks’ elsewhere on this site.
Next run a Carfax to ensure that the title is good and that the van hasn’t been in any major accidents. You will need the VIN so if the seller doesn’t want to supply that, move on, they are probably trying to hide something.
You also want to ask for records of work completed. Having an extensive mechanical history of your van from shops that know what they are doing is worth it’s weight in gold. I have bought vans that have all the records back to when they were new, and the work was done by either the VW dealer or reputable shops. I have also had mystery vans where you knew nothing about the history of the van. The ones with the detailed records had much less surprises than the ones with no records. In other words you will save thousands of dollars buying one that has been well maintained, versus buying a question mark van on Ebay. Yes the Ebay one is cheaper, but there is always a reason.
Rust is a big issue if you are buying a van that has lived in a rust prone environment for at least part of it’s life. Inspect the seam that is horizontal on the driver’s side and goes from behind the driver’s seat back to the rear wheel well. It is about three inches above the bottom of the sheet metal. This one usually rusts first. Inspect the rest of the seams closely and look for any sign of rust or brown color, bubbling under new paint, etc. Also inspect the areas around each window seal where the seal meets the body. Pop the rear hatch and look in the lower corners on the inside. Finally look underneath at the front door step wells. Usually the rest of the underneath will be in good condition as they did a great job undercoating these vans from the factory. Usually the rust is visible from above the van first. If it is clean up top, usually the underneath is also fine. If it is rusty up top where you can see, then inspect underneath as well. If the van has seam rust or rust around the window sills, just know that it will get worse over the course of the next few years, especially if you plan on using it in the winter in the North East. Repairing rust damage and repainting the van can be very expensive (4-12 Thousand dollars!) depending on how much work needs to be done so buy low enough to factor this in.
Dimensions
What are the dimensions of a Vanagon?
Height 6’4″
1.93 m
Width 6’1″
1.844 m
Length 15′
4.57 m
A Vanagon Syncro is about 1.2″ (3 cm) taller than a standard van.
What are the dimensions of a Vanagon Camper?
Height 6’10”
2.08 m
Width 6’1″
1.844 m
Length 15′
4.57 m
A Vanagon Syncro is about 1.2″ (3 cm) taller than the standard camper. A Vanagon Syncro 16″ is about 2.4″ (6 cm) taller than the standard camper.
Electrical
Batteries
How do I connect a 2nd battery?
Take a look in the battery compartment under your driver’s seat. Many Westy’s came from the factory wired to accept an aux battery. Look for a relay (silver or black cube about 1″ by 1″ by 1″ with several electrical terminals). If you have one of these then all you need is the proper battery, a ground strap, and a bit of wire and crimp-on connections. Note that the factory setup for the aux. battery will only supply power to your fridge and cabin light. You’ll have to run an additional power line to your dash to power your radio if you want it on aux. power. The fridge will deplete the battery in two or three hours.
Here’s what you need to do to connect an auxilliary battery if your bus comes with the relay installed. You should have a few basic electrical skills, if not, get some help from someone who does.
Disconnect your primary battery at the ground strap.
Disconnect the 2 red wires leading from the fuse box behind the drivers seat from the relay terminals. These wires lead to your fridge and cabin light.
Connect these two wires to the + terminal on the aux battery.
Run an 8 or 10 ga wire from the + terminal on the aux battery to terminal #30 on the relay. This terminal supplies current to charge the aux battery when the van is running.
Connect a ground strap to the aux battery.
Reconnect the ground strap on the primary battery.
That’s it. With this configuration, the aux battery supplies cabin power whenever your engine is not running. When your engine is running, the alternator charges both batteries and supplies cabin power. (Note: To start your engine with the aux battery, you’ll have to jump it to the main battery.)
Note that there aren’t any heavy-duty batteries that fit well into this space (11″l x 7″w x 6″h). A wheelchair battery fits, and gives you about 33 amp-hours. If anyone knows of any perfect-fit deep-cycle batteries, please send me mail.
Derek Drew has installed a deep-cycle 150 AH battery under the drivers’ seat, with the top of the battery ‘sticking up’ an inch or so. If you want to do this, Derek writes:
Completely remove the tray cover. Trim away the corner of the swivel base for the drivers seat so that seat can still turn without hitting the battery (you trim the right rear corner off the seat with a sawzall or similar device). Spray paint the sawed edge of the swivel base with black paint. Hammer the narrow mounting strip for tray cover into the upright position against the woodwork to the rear.
Optional: buy a pie tin to put over the battery. Cut the front edge of the tin if necessary, and coat with same color grey rug material.
The mysterious ‘Silver Socket’
The ‘silver socket’ is a European-style auto accessory outlet. It was installed in all ’74 – ’84 Westfalia campers imported into the U.S. According to Ronald Turner, the ’74 and ’75 Westies came with a small air compressor that used this socket. (The spare in those years came deflated!)
A plug which fits this socket is available from Hella (for about $12.) You can wire this plug into 12 volt accessories that you wish to use with the socket. You can also get a plug for these sockets from BMW motorcycle dealers (for between $10 and $35 – shop around!) They’re used on BMW motorcycles to power heated vests.
Vanagon Tire Tech
Tires are usually named with a series of codes. For example, one of the recommended tires for Vanagons is the ‘Yohohama Y356 LT 195/75 R14 (load range D)’. The latter part of this (195/75 R14) is a uniform code assigned to tires. This section tells you how to interpret this code.
Speed Rating
Sustained speed rating is designated by a letter code. Vanagons require a minimum speed rating of ‘R’. (Don’t be confused with ‘R’, though. In ‘195/75 R14’, the ‘R’ is means ‘radial’ and is not a speed rating.)
Q 99 mph 160 kph
R 106 mph 170 kph
S 112 mph 180 kph
T 118 mph 190 kph
U 124 mph 200 kph
H 130 mph 210 kph
V 149 mph 240 kph
W 270 kph
Y 300 kph
Z 149+ mph 240+ kph
(I’m not sure why ‘H’ is in there, except that some person thought it would be cool if ‘H’ stood for ‘high speed’.)
Tire widths
Wheel diameters are usually in inches and tire width in millimeters or a letter designation. In our example of ‘195/75 R14’, ‘195’ is the tire width in millimeters, and ’14’ is the wheel diameter in inches.
mm letter inches
80 MH 3.00
90 MJ 3.25
100 ML 3.50
110 MM 4.00
120 MP 4.50
130 MT 5.00
140 MU 5.50
150 MV 6.00
Shoulder heights
The shoulder height is stated as a percentage of the tire width. For example, in ‘195/75 R14’, the shoulder height is 75% of the tire width (195mm), or 146.25mm.
Load index
The load-index figure denotes the maximum load capacity of a tire when driven at maximum speed. Note that you have four tires, so you should multiply the load index value by approximately 4.
Vanagons & Syncros need a load rating of at least 97, while Syncro 16″ need a load rating of 104. In the chart below LI stands for Load Index and KG is Kilograms.
LI KG LI KG LI KG
65 290 83 487 101 825
66 300 84 500 102 850
67 307 85 515 103 875
68 315 86 530 104 900
69 325 87 545 105 925
70 335 88 560 106 950
71 345 89 580 107 975
72 355 90 600 108 1000
73 365 91 615 109 1030
74 375 92 630 110 1060
75 387 93 650 111 1090
76 400 94 670 112 1120
77 412 95 690 113 1150
78 425 96 710 114 1180
79 237 97 730 115 1215
80 450 98 750 116 1250
81 462 99 775 117 1285
82 475 100 800 118 1320
119 1360
Miscellaneous codes
P Passenger
LT Light Truck
R Radial
B Belted
Tire Diameters
What is the diameter of a tire?
Here’s a table of tire diameters by width and profile, for your speedometer correction calculations. Eurotire, a nice-to-deal-with tire distributor in NJ, used to include this info and more in their catalogs.
14 inch wheels:
80 75 70 65 60 55
165 622 — — — — —
175 634 — 606 — — —
185 650 631 624 596 578 —
195 — 651 636 605 590 —
205 — — 652 — 602 582
215 — — 665 — — —
225 — — — — 626 604
245 — — — — 650 —
15 inch wheels:
80 75 70 65 60 55
165 646 — — — — —
175 660 — 632 — — —
185 674 — 648 621 — —
195 — — 656 635 615 —
205 — 681 669 647 627 607
215 — 692 682 661 639 —
225 — 694 — — — —
235 — — — — 663 639
265 — — — — 687 —
Diameters are in millimeters, with tire installed on narrowest rims approved for that tire size. Wider rims would give slightly smaller diameter.
Signing up for the Vanagon Mailing List!
Back in the day, everyone was on the Vanagon email list affectionately known as “Gerry”. It still lives and if you would like to join here is a link Vanagon Mailing List
It is still a place to find help, and companionship with your fellow Vanagon owners. It is over 20 years old and still going strong!